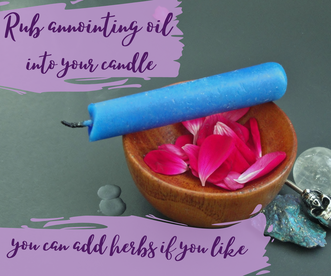
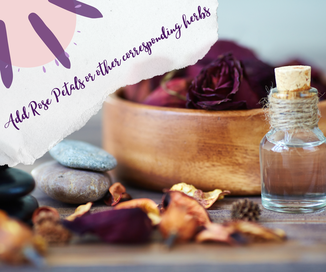
  How to use Anointing Oils in Spellwork First let's talk about why you would want to use anointing oils. Anointing oils are used to give intention and to heighten and strengthen the working of the spell. In our shop you can find anointing oils for prosperity, money, banishing and more. (We are working on a Dream Job Oil and we are really excited about it!). Anointing a Candle To use the anointing oil in a candle spell, simply carve your candle with your intention, Simple words or symbols will do. You could put your name or whatever else you'd like to add for the intention and purpose of this spell. After you have carved your candle and set your intention use your anointing oil by using the dropper to drop one or two drops onto the candle and rubbing it in. You can then choose to add herbs corresponding to your spell if you like. You would simply roll your oil anointed candle in a plate of the herbs and they should stick because of the oil you put on. Now you will write your petition paper, setting your intention for this spell. You will place it under the candle and light the candle letting it burn all the way out. If you cannot let it burn all the way out and have to put it out before it goes out on its own, do not blow it out make sure you use a snuffer.
 Try Here at VP, we have our own in-house signature blend of anointing oils. We carefully and mindfully craft them from high quality, organic, all-natural ingredients that are eco-friendly. We are working on several more varieties, but currently we have three oils available; Money, Prosperity and Banishing. The Banishing Oil is totally amazing for work in banishing bad habits, addictions, things that no longer serve you and so on. The Money Oil is great for, well....drawing money, of course. Whether you are looking to manifest actual cash in your pocket, or money made from and influx of sales (business owners), or a pay raise, this works for all of the various ways of drawing money to you. Just set your own, very specific intention when using this oil. The Prosperity Oil is honestly my favorite! It covers prosperity on every level, physical, mental emotional and spiritual. The whole package, the whole enchilada, like....ALL of it! Money, Career, Love, Family, Spirituality, Health, EVERYTHING! That's why it's my favorite. Try it out and see how you like it! We're sure you will absolutely love it, but if you're concerned about it, we do offer a 100% Satisfaction Guarantee. Just return the product to us within 15 days and we will issue a full refund. AuthorVirgo Phoenix
0 Comments
How to Create Festive Thanksgiving Decorations
Thanksgiving is a time of year when the evenings are getting dark earlier, the chill is beginning to set in, and the lovely autumn leaves of October are off the trees. The fairs and festivals of summer are over, and people are spending more time indoors. Beautiful and inviting decorations can help make this a festive, inviting time. Here are some ideas on how to create festive Thanksgiving decorations. 1. Candle Wreaths Candles are a perfect decoration for the darker days of late fall. They bring a cozy light indoors and provide a festive atmosphere. Remember never to leave a candle unattended, and keep all flammable objects and decorations well away from the flame. These are fun because you can make them in all kinds of sizes and put them in bay windows, on sideboards, tables, and wherever it's safe to have a candle. To make candle wreaths, you'll need: * Floral foam rings of various sizes * Dried or silk flowers and/or leaves * Pillar candles and votive candles * Clear glass holders such as hurricane shades for the pillar candles and clear glass holders for the votives Cut the silk or dried flowers and leaves so that you have a stiff stem to press into the foam rings. Use a hot glue gun if you need to reinforce the flowers or if you don't have a stem to push into the foam. Then place the candle holders and candles in the center, and place wherever you like. You could even place one at each guest's place at the table and let them take the wreath and candle home. 2. Pumpkin Vase For an unusual Thanksgiving centerpiece, use a pumpkin for a vase. Here's how. Cut the top off of a pumpkin and hollow it out as you would for a Halloween jack-o-lantern. Inside, place a large plastic container full of water or floral foam (it doesn't matter what the container looks like since it will be covered by the pumpkin). Place cut flowers such as mums and other seasonal plants into the floral foam or container until you have a nice arrangement. 3. Platter of Plenty Many households have more platters than they can use. Pull one out to use as a centerpiece or a decoration on a bay window or mantle. On the platter, arrange colorful gourds, decorative field corn, and fall squash on the platter. Put the tallest, largest objects in the center and work outward. Fill in with ivy, mums, and pretty seed pods and branches from outdoors. This is a great time to use all those acorns that are crunching under your feet outdoors! 4. Fall Fruit Basket Place this in a prominent place in your home and encourage family members and guests to partake, then replenish! It's healthy and beautiful. All you need is a pretty basket, dried or silk flowers, a hot glue gun, brown and green tissue paper, and some plastic wrap. First, line the inside of the basket with plastic, then with the brown and green tissue. This is where your fruit will go. Then, hot glue dried or silk flowers to the outside of the basket, grouping similar flowers together. Fill the middle with fruit and set out for everyone to enjoy. Homemade Wreaths
Have you ever looked at lovely holiday wreaths and then experienced sticker shock? Or maybe you've seen homemade wreaths and wished you could do that. Luckily, there are so many possibilities for wreath designs and materials that you're bound to create something beautiful once you find the right idea! Here are some ideas and how-to advice on homemade wreaths. 1. Acorn Wreath The look of acorns is so festive, and it's such a versatile look - you can embellish this wreath with sprigs of holly, pinecones, or ribbon, or simply leave it as-is. First, gather your acorns and place them in a paper bag. Freeze them for 24 to 48 hours to make sure no bugs are hiding out in the acorns. Once they're frozen, you will have better results if you dry them in an oven on a cookie sheet for an hour or so at 200 degrees F. That way, the acorns won't be as likely to shrink after you've placed them on the wreath. To make the wreath, simply hot glue the acorns to a wreath frame. Foam, grapevine, or hay wreath frames work well, but anything flat, sturdy, and circular will do. 2. Cardboard Tube Wreath For the eco-minded among you, make a wreath out of cardboard tubes (such as toilet paper and paper towel tubes). Cut the tubes into various lengths to add variety, then paint them. Use several different seasonal colors if you can. Next, arrange the tubes with the open ends facing you in a ring shape. When you're happy with the arrangement, hot glue the tubes together. The handy hollow tubes leave the perfect place to hang the wreath, and you can glue all sorts of interesting miniatures inside the tubes - small ornaments, acorns, figurines, or whatever you like. 3. Traditional Greens If you have access to fresh-cut greens such as juniper, hemlock, or holly, you can weave your own traditional wreath. Be sure to wear sturdy gloves when you gather the greens into bunches of the same approximate size and wire them together. Then take the wired bunches (still wearing gloves) and wire them onto a wreath frame - it will also need to be wire. Tuck the wired ends of the greens under the branches of the bunch before it. You can even do this without a wreath frame; just wire the bunches into a ring. 4. Fruit Wreath Citrus fruits and apples make a lovely wreath. For a base, you can use a basic greens wreath, grapevine wreath, twigs, or other natural frame. Use thick floral wire to pierce the fruit and wire it to the frame. Alternatively, you could use a large sewing needle and upholstery thread to attach the fruit to the wreath. When you're finished, you can hot glue some bay leaves around the fruit to fill in any unfinished or open areas. Homemade Christmas Tree Decorations
Homemade Christmas tree decorations can make for some fond holiday memories with your family. Special ornaments can bring back memories of holidays past and remind family members of fun times and ages. And in these frugal times, homemade Christmas tree decorations can help stretch the holiday budget. Here are some ideas for making your own ornaments and decorations for your Christmas tree. 1. Popcorn Chain Use some air-popped popcorn and red beads to make a pretty popcorn chain. You can also do this without the beads. Thread a sewing needle with upholstery thread. Push the needle through the popcorn kernels one at a time and push them onto the thread. Don't cut off the length just yet; unwind the thread as you go until you reach the desired length. Then cut it off and tie in a knot at both ends to keep the corn from slipping off. 2. Cinnamon-Scented Dough You can make cinnamon-scented, permanent, non-edible ornaments out of dough. They last for years and look lovely. Here's how you make the dough: In a bowl, mix together: * 1 cup cinnamon powder (ground cinnamon) * 1/4 cup applesauce Then add: * 1/2 cup white craft glue This mixture forms a stiff dough which smells wonderful and looks like brown gingerbread. All that's left is to roll out the dough and cut out the desired shapes. When dough is still soft, decorate with dried cloves, buttons, beads, etc. After they dry, you can paint them. Don't forget to leave a hole at the top for the hanger. 3. Buttons Do you have a button collection sitting around? There are several kinds of ornaments that can be made with buttons. Here are some ideas. * Wreaths - String buttons on wire pieces about 9 inches long. You can use floral wire or thin copper wire. Use needle-nose pliers to make a small loop at one end of the wire before you string on the buttons. Then bend the button-covered wire around into a circle and use the pliers to attach the straight end of the wire to the loop. To hang, tie a ribbon to the juncture where the wires meet, and use another ribbon to make a bow where the ribbon tie is. * Garland - Buttons can simply be strung on string to make a garland, or used to augment a popcorn garland. * Decorative balls - Glue buttons to plain Styrofoam balls or worn-out commercial Christmas balls. 4. Cards Use holiday cards to make ornaments. You can simply punch a hole in the upper folded corner and hang with ribbon, or you can get more elaborate. Try cutting out two circles from the card, and cut a slit halfway across the middle of each circle. Push the slits together to create a 3-dimensional ornament. Punch a hole at the top for a hanger. Homemade Centerpiece Ideas for Your Thanksgiving Table
Thanksgiving centers around the table. Therefore, the centerpiece you have for your table says a great deal to your guests and family members. When it's a homemade centerpiece, it can be a conversation starter, and it shows your guests you care enough to invest some time in them. Here are some homemade centerpiece ideas for your Thanksgiving table. 1. Winter Squash Vases Think beyond the pumpkin for these lovely vases made from butternut squash. Cut the top inch or so off of a butternut squash, and use a paring knife to dig/cut out the insides. Beware: butternut squash flesh is rather hard. So the best way to accomplish this is to use the paring knife to cut progressively-deeper circles around the inside edge of the squash neck. Once you get down to the bulbous seed chamber, you can scoop those out with a spoon. Then add water and seasonal flowers such as mums, straw flowers, and berry sprays. If you make several of these, choose squash of various sizes and/or cut the squash so that you have an arrangement of different heights. 2. Three Little Pumpkins Have you ever been at the farmer's market or grocery store, and wanted an excuse to buy those little pumpkins? Now you have one! You'll need three small pumpkins (about the size of a cantaloupe) for this project. You'll also need: * Hot glue * Buttons * Fabric ribbon in holiday colors, about half an inch wide * Curly ribbon in holiday colors * Hat pins with pearl heads * White glue or decoupage medium * Fabric scraps in holiday colors You can take these basic supplies and make three pumpkins that are the same, or three pumpkins that vary in design. Here are some general guidelines for the decorations, and you can apply them how you wish. Attach ribbons vertically to each pumpkin using white glue or decoupage medium. Coat the ribbon strips with glue, running your finger along the ribbon to scrape off excess. Attach strips from the base of the stem to the bottom center of the pumpkin. Cut squares of fabric and attach to the pumpkin with decoupage medium. Arrange another square on top of the first in a sideways fashion, so the corners of the first piece are showing. Then attach a button to the center of this arrangement using one of the pearl-top pins. Decorate the pumpkin stems (and cover up your fabric ribbon ends) with curly ribbon. 3. Swan Gourds Look at the market for long, thin-necked gourds in various sizes. Make sure they have the stems attached - these will be the swans' bills. In addition to these, you'll need: * Grapevine wreath (the swans' nest) * Craft paint and/or permanent marker * Pine cones, acorns, berries, and other "nest-like" decorations from nature * Raffia * Hot glue All you need to do is use a little craft paint or even a permanent marker to create eyes on the swans on the stem end. You can do some with eye lashes, others with colorful eyes - however you wish. Tie raffia ribbons around the swans' necks and nestle them in the grapevine wreath (which you will need to lay sideways). Arrange acorns, twigs, and so forth around them and attach with hot glue. Holiday Decorations Your Kids Can Make
Involving your kids in the holiday decorating can be a lot of fun. Holiday decorating crafts are also a great way to spend time during the bad weather that sometimes comes with the holidays. Here are some ideas for holiday decorations your kids can make. 1. Turkey Bouquet This edible bouquet will look fun and whimsical in your home at Thanksgiving. You'll need: * Lollipops (the spherical, wrapped variety) * Brown and tan felt * Small rubber bands * Wiggly eyes * Red and yellow craft foam * Hot glue gun First, cut the felt into circles about 8 inches across. Then, fold each circle in half twice (fourths) and snip off the pointy end to make a small hole (this will be for the lollipop stick). Starting at the bottom of the lollipop, push the stick through the hole in the felt and draw the felt up over the lollipop. Using the rubber band, secure the felt at the top of the lollipop and fan out the remaining felt. Use the hot glue gun to attach the wiggly eyes, red wattle, and yellow beak cut from the craft foam. Place these in a small vase or bowl for a fun bouquet. 2. Button Corn Hang this creative corn craft on your front door to welcome guests. You'll need: * Craft foam in seasonal colors (red, yellow, orange, blue, brown, etc.) * Scissors * Buttons * Raffia * Hot glue gun or white glue Cut 3 or 4 corn cob shapes from the craft foam, each about 12 inches long. Punch a hole in the top of each one. Then use glue to attach buttons to the cobs. Choose colors that are reminiscent of decorative field corn. When you're finished, attach them with a raffia bow. 3. Wrapping Paper Chains There are always scraps of wrapping paper about at holiday time. Cut them into strips about 8 inches long and 3/4 inch wide, and make them into interlocking loops. This makes a colorful and festive paper chain that fits the season. You could also use holiday cards for this. 4. Sock Snowmen This is a fun craft with no sewing. For one snowman, you'll need: * A white sock * Small dried beans or rice * Rubber bands * Yarn * Fabric paint or markers * Wiggly eyes * Cloth scraps Put the rice or beans into the sock until it's about 2/3 full. Close off the top with the rubber band, leaving 1 to 2 inches of sock at the top. Then move the filling apart so that the top (where the rubber band is) has less filling than the bottom. Secure the division with another rubber band. Now roll down the excess sock at the top to make a hat. Set the snowman upright and you shouldn't be able to see the rubber bands. Decorate your snowman however you like. You can use fabric scraps to make scarves, buttons for the front of the snowman, and pom-poms for the top of the hat. Use markers and fabric paint to decorate as well. Green and Eco-Friendly Decorating Ideas for the Holidays
One of the wonderful things about holiday decorations is that so many of them can be made from recyclables. Just making ornaments and decorations instead of buying them is green in itself, even if you don't use a plastic water bottle in the making of it! Put the "green" in "evergreen" this holiday season with these green and eco-friendly decorating ideas for the holidays. 1. Christmas Trees There are eco-friendly arguments for artificial trees as well as natural ones, but it's generally agreed that a live tree with a root ball is the most environmentally-friendly choice for live trees. However, you can bypass the dilemma by making your own tree. Here are some ideas. * Choose a wall and run strings of lights downward in a tree shape (use LEDs if you can). You can use a recycled paper star for the top, and even attach lightweight ornaments to the light strands. * Use embroidery hoops of varying sizes covered in green cloth, and arrange them on a wall in a tree shape - large ones along the bottom, for example, then smaller toward the top. You can insert most ornament hooks right into the fabric to decorate. * Use wooden boards of gradually shorter lengths to make a tree shape. Nail them to a sturdy stand such as a 2x4 mounted to a wood X shape. Nail the longest board horizontally near the bottom, then follow with the next-longest board, and so on until you reach the top. Leave space between each board. Then you can paint the tree and/or attach screw eyes to the boards to hang the ornaments. 2. Nature's Bounty There are so many ways to use nature's bounty to make holiday decorations. For example, you can make frozen luminaries using two different plastic containers (maybe one small and one large yogurt container?). Place autumn leaves in the large one and fill it 2/3 full of water, and then put a few rocks in the small container and put it in the middle. When you freeze this arrangement and unmold it, you end up with frozen autumn leaves in a block of ice that has a hollow at the top from where you removed the small, rock-filled container. You put a candle in this hollow and light it up. You can also fill clear glass containers with pine cones, acorns, and holly berries. Alternatively, you can fill clear glass containers with greens like ivy, then pour water over them and float disc-shaped candles or tealights on top. Cut natural evergreens and bring them in to your home to decorate, creating a lovely smell and look. 3. Twigs and Branches Make a lovely tabletop tree by inserting curvy, interesting branches into a vase or cup. Then hang eco-friendly ornaments from it, such as painted (or unpainted) toilet paper tubes, old CDs (cut into interesting shapes if you have the tools), and even beverage cans in seasonal colors. You can also paint acorns and use those to brighten up your twig tree. Fall Harvest Decorating
Fall has been a traditional time of harvest celebration since the days when farming was commonplace, and this theme continues today even in urban communities. Decorating for the fall harvest means celebrating the plenty of the season and heralding the change from summer to winter. It can also be a festive time to usher in the holiday season. Here are some tips and ideas for your fall harvest decorating this year. 1. Charming Frames Chances are, you have picture frames stored away in various places in your home. They make popular gifts, and many of us end up with more than we need. If not, you can often find them for very little money at second-hand stores and even some major retailers. You can make fall harvest decorations from these ordinary frames. Lightly glue pressed leaves and/or flowers onto a blank white background, such as a piece of card stock, and insert it into the frame. If you are lucky enough to have frames with two pieces of glass, you can achieve a floating leaf look by sandwiching it between the glass. These look nice on a table, mantel, wall, or anywhere you want to bring the autumn in. Another note on frames - using a hot glue gun, you can attach acorns, seed pods, and other autumn odds and ends to the frame itself. 2. Natural Vases for Fall Bouquets You may not have considered this before, but autumn brings all sorts of interesting fruits and vegetables that you can use as vases for fall arrangements. The best sorts of vegetables and fruits for this type of decoration are those with a long shelf life, such as squashes, gourds, and apples. But you can certainly think outside the box if you're only going to have the decoration up for a few hours. In that case, you can include citrus peel cups and even hollowed out pears. Basically, you slice the top off of the vegetable or fruit of your choice, and then dig out the flesh to the depth you need. You can then fill it with water and flowers, or use floral foam. 3. More with Gourds and Pumpkins All those inexpensive little gourds and pumpkins are readily available in the fall. Gather lots of them and make a wreath using hot glue and a circular base (such as grapevine or a foam craft ring). Another idea is to arrange gourds on a cake plate, or pile them in a tiered tray. You can even make a garland of small gourds, stringing them on fishing line or upholstery thread. Holiday Decorating DIY: Indoor and Outdoor
The holidays are a special time of year that is made all the more memorable by decorating. As you think about how you're going to decorate this season, consider making your own holiday decorations. Whether you want to decorate indoors or out (or both), there are DIY options that can save you money and be enjoyable projects. Here are some ideas for DIY holiday decorating indoors and out. Outdoors Outdoors can be fun to decorate. People driving by your home can enjoy looking at your innovative decorations. Try some of these outdoor decorating ideas. 1. Holiday cards for your lawn Raid your storage shed, garage, and basement and dig out the scrap wood! You can make large-scale greeting cards for your lawn or, alternatively, vintage-look signs to hang in your porch entry or on your front door. For greeting cards, you'll need two pieces of same-size scrap wood. Paint them a solid background color using spray paint, and when that is dry, decorate them as you like. You will need to spray the cards with some clear coating after you're finished or cover them with a water-resistant, clear varnish so they can survive the weather. Then put them together with hinges and set them up on the lawn. Some spot lights or other illumination will add to the effect and make them visible after dark. Vintage-look signs can be made with only one board. Paint the board partially, using a dry brush with little paint for a distressed look. Then you can stencil a word like "Joy" or "Peace" down the board. 2. Speaking of doors... Wrap your front door to look like an enormous gift. You can buy these ready-made, but since we're talking about DIY, just use wrapping paper to cover your front door, and criss-cross with wide ribbon. Finish with a large bow. 3. Icy-hot luminaries Once you get the principle behind making these, the possibilities are almost endless. The basic method is to freeze water in the bottom half of an empty 2-liter bottle that you've cut in two. Fill about 2/3 full with water and whatever lovely objects you want to freeze - cranberries, holly sprigs, poinsettia leaves, etc. - and then put a smaller plastic bottle filled with rocks in the center. When you freeze this arrangement, you'll have a hollow center where the rock-filled smaller bottle was. This is where you put the tealight to make the luminary. These are great for frosty nights - blow out the candles and you can keep them outside if it's cold enough. Indoors Don't forget to bring the holiday spirit inside with DIY decorations. Here are some clever DIY decorations. 1. Boughs of holly...and evergreens Bring in branches of greens and hang them on the wall using festive ribbon and a decorative wall hook. Use them as hangers for cards, stockings, or Christmas ornaments. 2. Wall tree Fabric trees make wonderful decorations: they solve the dilemma of what kind of Christmas tree to have, ornament hooks attach to them perfectly, and they take up far less space than a free-standing tree. Ideas for wall trees that you can hang ornaments on include: * Felt tree - use fabric glue to attach a large, felt cut-out of a holiday tree to a white cloth backing and use a dowel and ribbon to hang it. * Embroidery hoops covered with various shades of green fabric can be arranged in a triangle pattern on your wall (a brown fabric-covered hoop can be used for the "stump"). Hang ornaments on the cloth.  Where Can I Buy A Wedding Planner Book?
Some people, who are only having a small to medium wedding may opt out of hiring a wedding planner and simply use the tools that a bridal consultant utilizes to keep things moving along smoothly. If you are planning wedding yourself, you will need to have a few things in your arsenal in order to be successful. At the top of your list should be; how to stay organized, what and when to prioritize and where to get a wedding planner book, that will show you how to do everything you need to pull off a perfect wedding. Staying organized means that you will need to list out everything that needs to be done, Figure out who you can delegate tasks to, and what vendors you need to contact. You will also want to keep all of your notes, meetings and appointments, vendors, the deejay, photographer and video services all in one book that you can refer to when needed. This falls to the wedding planner book, where you can organize everything for easy access. First, check out your local bookstore or an online bookstore like Amazon. In our local bookstore, Barnes and Noble, there are a wide plethora of wedding planners from which to choose. Simply head to the wedding section of your bookstore, and you should be able to find a wedding planner that works for you. Once you have picked out what you want to work with, look around for a couple of quick reads on how to plan a wedding so that you know where to start and how to proceed. I actually offer a book of my own on this site that you can purchase for $9.99 as an immediate download, by clicking here. This is an eBook that you can print out and put into a binder where you can keep all of your notes and everything together. You will also want to stay very organized as you work out the details of your very special day. Next, you are going to want to organize around your wedding planner. Remember that everything that you need, take note of or scribble should wind up in your wedding planner. Only use one thing, your wedding planner, to work with. You don’t want to be juggling between your day planner, a notebook, post-it notes and cocktail napkins.. Your wedding planner should be your best friend and go with you everywhere. As you talk to people, make appointments and come up with ideas, it should all go into the same place – the wedding planner. You will want to establish and track expenses as the ideas flow about what you can add to your wedding plans. As you work through the various items on your To Do list like cake, flowers, photographer, videographer and the like, you will want track your expenses. All of these things can be kept in your wedding planner so that you know exactly where you are in the process.
 What the Law Says about Making and Selling Your Own Wine
Making your own wine can be much more than a simple hobby. Once you know what you are doing, you may be looking to sell your creations. The question is, is it legal to make and sell your own wine? Here, we’ll look at the legalities of making and selling your own wine, and the things you’ll need to consider. Is It Legal to Sell Homemade Wine? While you can legally make up to 200 gallons of wine per two-person household, unfortunately it is illegal to sell it without formal permission. The quantity also drops to 100 gallons for those living alone. If you do want to sell the wine you create, you’re going to need a number of permits. Firstly, you’ll need to apply to the Alcohol and Tobacco Tax and Trade Bureau to seek their approval. You also need to know how the business will be structured. For example, are you going to create a winery, or will you be selling it in smaller quantities? It’s important to research the legalities before you get started. You’ll need to wait for your permits before you can sell it legally. You may find it best to seek expert advice. That way, you’ll know exactly how the process works and they can help you to apply for any permits you do need. Understanding Your State’s Laws Like with most things, the laws relating to selling your own wine vary from state to state. This means you are going to need to research specific laws in the state where you reside, as well as understand other state laws if you plan on selling it throughout multiple states. Some states have much stricter rules you need to adhere to. However, most require a permit before you can get started. You only don’t need permits if you plan on using the wine for personal use with friends and family. Breaking the law regarding the sale of alcohol can lead to pretty harsh consequences. So, it’s always worth taking the time to familiarize yourself with the rules. Is It Worth Selling Your Own Wine? Due to the fact that you do need to jump through quite a few hoops to sell your own wine, is it worth it? This will depend upon how serious you are about turning it into a business. You’ll need to make sure your wines are high quality and meet all safety standards. There is also bottle labelling to be aware of and a strict set of rules to follow. So, you should only get into this type of business if you are serious about doing it. Setting up an actual winemaking business is expensive and time-consuming. For most people, simply making their own wine to enjoy with friends and family is enough. Therefore, before you decide whether or not to sell it, think about the cost and effort of turning it into a business.  Tools and Equipment You Will Need When creating wine, there are a few tools and equipment you’re going to need. The exact things you’ll need will depend upon what type of wine you are making. How much you plan to make, the fruits you are using and how much space you have available will also impact the tools and equipment you’ll need. Below, we’ll look at a general guide of the tools and equipment used during wine making. A Press and Crusher If you’re going to be using fresh fruit, a press and crusher are essential. If you are following this method, the fruit will need to be fermented for a set period of time. This time will differ depending upon the type of fruit you are using. You can purchase one easily and inexpensively on amazon by clicking here. If you are just starting out, many experts recommend starting with fruit juice or concentrate. This will allow you to skip the fermentation process and you won’t need a press or crusher. A Fermenter If you do plan on using fresh fruit, a fermenter is an important piece of equipment you’ll need. It helps to ensure the fruit is safely and correctly fermented. It uses specific microorganisms to help ferment the fruit into wine. You’ll find a lot of different models on the market so be sure to compare them and read consumer reviews prior to purchasing. You can purchase one from amazon by clicking here. Cleaning Agents During the winemaking process, hygiene should be a top priority. There are cleaning agents and tools you can invest in which make cleaning your equipment more efficient. These include jug and carboy brushes. You’ll also want to look at cleaning agents such as potassium metabisulfite and citric acid. Be sure to research everything there is to know about cleaning your equipment before you begin. You can purchase this on amazon by clicking here. Hydrometer and Thermometer If you are following the fermenting process, a hydrometer is a useful tool. It helps to show you the weight of liquid compared to water. They are really inexpensive to purchase, but they are fragile so it’s best to have a spare just in case. A thermometer can also help you to monitor the temperature of the wine. If you want it to taste and look like wine, you’re going to need to make sure the fruit doesn’t spoil. To purchase a hydrometer click here, and for the thermometer, click here. Acid Testing Kits Both before and after the fermentation process, you’re going to need to test the level of acidity. You can do this with acid testing kits. If you want the fermentation to be effective, there needs to be a good balance of sugar and acid. You’ll find these kits are relatively cheap to purchase. Click here to buy on amazon. Bottles and Closures After you’ve made the wine, you’re going to need to store it. So, invest in a good selection of bottles and closures. You’ll be able to find these in abundance online. Here a link to some on amazon, just click here.. As you can see, you need a lot of tools and equipment to start making your own wine. There are wine-making kits you can purchase which come with everything a beginner needs. So, why not invest in one of those first and then add to your collection if you become a more serious winemaker. Here's a link to a kit, just click here.  The Best Fruit to Make Wine From
When you are creating your own wine, you have full control over what goes into it. There are so many different types of wine you can create, and a lot of different ingredients to choose from. The main ingredient of most wines is fruit. You can use a variety of fruits to create wine, so which ones are best? Here, we’ll take a look at some of the best types of fruits you can use to create your own wine. Grapes The majority of fruit wines on the market today are made with grapes. This is because they are the easiest fruit to use in the winemaking process. They allow for clean, fast fermentation. As well as being able to use them alone to create delicious-tasting wines, grapes can be easily blended with other fruits too. There are a lot of different types of grapes and you can use them to create both red and white varieties. Some of the best grapes to use during home winemaking include Chardonnay, Sauvignon and Malbec. However, you can use whichever variety you prefer. Blackberries If you’re looking to create a delicious red wine, blackberries are a great choice. However, this type of fruit wine will also take the longest to make. It is recommended blackberry wine is aged for at least two years. This creates a bold red wine. You could also add pears or apples for a more unique flavor. Plums Plum-based wines feature a beautiful flavor and color. The plums need to be chopped up in order to ferment. These types of wines are early to mature and they take around a year before they are ready to drink. Pears and Raspberries You can create tasty wine by using just pears or raspberries. However, did you know that if you combine the two you are left with a mouthwatering flavor? The raspberries add a great aroma and they also alter the color of the wine. If you’ve never tried pear- and raspberry-based wine, now is the time to make some. Strawberries Another fruit that makes a beautiful wine is strawberries. However, they are also one of the hardest fruits to work with. This is because they have a very long fermentation period. This means you’ll want to wait a good amount of time before it is bottled up. Like most other wines, it is best if it is aged for at least one year. Rhubarb Not recommended for the beginner, rhubarb wine delivers a unique flavor profile. It takes a staggering four years before it is drinkable, but the wait will most definitely be worthwhile. Once you have experience making wines, you can try out creating your own rhubarb-based variety. So, there you have it – some of the best fruits to make your own wine. Before getting started, it’s worth researching everything there is to know about fermenting the different fruits. There is a lot to learn with winemaking before you get started and how to use the fruit is just one thing you’ll need to know.  The Basic Steps for Making Your Own Wine
Thinking of making your own wine at home? There are some basic steps you’ll need to follow. The process can be quite complex, depending upon the type of wine you are making. Therefore, it is really important to do your research before you get started. Here, we’ll run through some of the basic steps for making your own wine. Stock Up on Ingredients, Tools and Equipment Before you get started, it’s important to make sure you have everything you need. This includes all ingredients, tools and equipment. In another article we’ve covered the different types of tools and equipment you’ll need. However, ideally you should do your own research based upon the type of wine you want to make. In terms of ingredients, if you’re making your own fruit wine you might want to add some optional ingredients. These include bananas, raisins or white or red grape concentrate. These optional ingredients add sweetness to the wine. I have another article here on the blog with links to all the tools you will need, read it here. Find a Recipe Online You’re going to want to follow a tried-and-tested recipe when you’re just starting out. So, look for some good wine recipes online. You’ll find sites such as Pinterest are fab for discovering easy homemade wine recipes. Remember to look for beginner recipes too. The more advanced recipes tend to require technical steps that you likely won’t be ready for right now. Once you have made some basic beginner wines, you can look at creating your own recipes. Prepare the Fruit Before you make the wine, it’s important to prepare the fruit. This includes removing any stones and seeds from pitted fruit like plums or grapes. This is because the seeds will add a bitter flavor to the wine. Once this has been done, you’ll want to freeze the fruit to help break down the walls of their cell membranes. This makes it much easier to extract the juice. After freezing, thaw the fruit out and place it into a nylon bag ready to extract its juice. Use a press to do this or add sugar and leave it to extract naturally. Ferment the Ingredients Once you have the juice of the fruit, it’s time to ferment it. Different fruits require a different fermentation time, so do your research to see how long the fruit you have chosen should be fermented for. You should also follow specific fermenting advice for the type of wine you are making. Siphon the Wine Regularly As the wine is fermenting, it will need to be siphoned into clean containers regularly. So, if using a carboy, you can siphon the wine into a clean carboy as and when it is required. Again, different wines will need to be siphoned at different rates. These are the basic steps of making your own wine but as mentioned, the process is quite complex. For this reason, it is recommended you learn as much about the winemaking process before you attempt to make it yourself.
 Rookie Wine-Making Mistakes to Avoid
When you’re creating your own wine, there are a lot of mistakes you can make. Even expert winemakers aren’t immune to making mistakes along the way. It is a learning curve, but luckily you can learn from other people’s mistakes. Here, we’ll look at some of the top rookie mistakes to avoid when creating your own wine at home. Using Poor Quality Ingredients You aren’t going to be able to create a high-quality wine if you’re using poor-quality ingredients. Therefore, it’s important to make sure you choose the best of the best if you want to enjoy the best flavor. If you are growing your own fruit that will be used in the wine, be careful when you pick it. If you pick it too early or late, it’s going to drastically impact the results. Even the yeast you plan to use during fermentation should be of a high quality. Using Inadequate Equipment Alongside using poor quality ingredients, using the wrong equipment is another rookie mistake. Things like carboys and spoons may look similar to common household items. However, you’ll find actual winemaking tools and equipment are made with special materials. So, using standard homemade objects isn’t going to give you the same quality wine. In particular, avoid using utensils from around the home – especially those which have been used for cooking. This is because over time, the food odors seep through into the utensils. This can then be transferred into the wine, impacting its flavor. Not Following Instructions If you are just starting out, you’re going to need to follow instructions to create homemade wine. The trouble is, many people fail to follow the instructions properly. This could be because they don’t know what the instructions mean, or they may simply miss a step along the way. Put simply, if you don’t follow instructions, the wine isn’t going to taste how it should. In fact, you could end up spoiling it completely. Mistakes in the Fermentation Process The fermentation process is the most difficult part of the winemaking process. This is because each type of fruit needs to be fermented for a different period of time. Any mistake you make in the process can have devastating consequences on your wine. It is really important to understand everything there is to know about fermentation before you start making your own wine. Ensure you understand the terminology and how the process should work. If you bottle the wine before it has fermented, the process will carry on in the bottle. This could push the cork out, as well as compromise the quality. There are a lot of mistakes you can make in winemaking but the above are some of the most common. When you are just starting out, you need to follow specific recipes and spend a lot of time learning about the processes you can use. The more knowledgeable you are, the fewer the mistakes you are going to make.  Making Sparkling Wine
Still wine is the most common to make at home. However, it is possible to make your own sparkling wine too. It takes approximately nine months to create sparkling wine and there are three main stages you’ll need to follow. Here, you’ll learn the basics of making sparkling wine. As with any type of winemaking, it is better to research as much as you can before getting started. This will help you to achieve the best flavor and results. Fermenting It Twice The main differentiating factor between still and sparkling wine is the fermentation process. If you want to make sparkling wine, you’re going to need to ferment it twice. After the initial fermentation process, you’ll need to add yeast and sugar. When mixed in with the wine, it begins the fermentation process again, only the carbon dioxide produced by the yeast has nowhere to escape to. This causes the wine to become bubbly. There are actually different methods you can use to create sparkling wine, and it’s worth understanding what they are. The Traditional Method The traditional, or champagne, method is the most common method used by wineries. However, it can be expensive and extremely time-consuming for homemade wine. You’ll carry out the second fermentation stage in the bottle the wine will be stored in. A temporary cap will need to be used until the process has finished. After the yeast has worked, it dies and turns into lees. This will stay in the wine until it is removed. How long you leave it in will determine the taste and texture of the wine. A process known as riddling is used to remove the lees from the bottle. This is actually quite difficult to do yourself, which is why many people choose to use alternative methods when making their own sparkling wines. The Charmat Method If you are looking for a cheaper alternative, the Charmat method is ideal. Named after the person who invented the method, it involves fermenting the wine in a tank, rather than in bottles. The yeast and sugar are added to the tank and it gets to work much like it does in the traditional method. When it has stopped fermenting, the wine is filtered and then bottled. This method produces a clean, aromatic wine that is easy to drink. This method is easier to use at home and is much less expensive too. Alternatively, you could use the hybrid method. This involves a mixture of both traditional and Charmat techniques. You’ll carry out the secondary fermentation in bottles, then empty them into a pressurized tank. The sediment can then be filtered before the wine is packaged into bottles. It is worth being aware of the different sparkling wine methods so you can ensure you are selecting the right one for you. If budget is a factor and you are just starting out, the Charmat method is the best one to use. Try to research everything you can about the method before you get started.  How to Store Your Wine
Once you have made your wine, the work doesn’t stop there. You now need to ensure that it is stored correctly. If it isn’t, it could ruin the wine and give it a sour flavor. If you want to wine to retain its quality, there is a process you should follow. Here, we’ll look at the main things you need to do in order to store your wine correctly. Make Sure You Use a Quality Cork It may seem like a small detail, but the cork you choose to bottle the wine is extremely important. It helps to determine the quality of the wine, with poor quality corks potentially causing the wine to oxidize. Ideally, you’ll want to look out for a cork that is long and less porous. This is because this type of cork creates the best barrier. It enables you to potentially age the wine further too, giving it more of a full flavor. It may sound trivial, but the type of cork you choose can potentially improve or ruin the wine. What to Do Immediately After Bottling Once you have bottled the wine, you’ll need to make sure it stays in an upright position for around 3-5 days. This ensures the cork has time to fully expand, creating a tight seal at the top of the bottle. If you don’t give it time to expand, the wine could leak when you lay it down on its side. You should also check how long you need to store the wine for. Does it need to age for a specific amount of time? If so, don’t forget to add this to the label, marking down when it will be best to drink it. Where Should You Store It? Homemade wine is best stored in a cool, dark environment. You can store it on its side in a wine rack, making sure the temperature of the room remains consistent. If you don’t have a wine cellar, you can invest in bespoke wine racks. These are designed to keep the wine in an optimal environment. Temperature and Humidity The most important things to pay attention to when storing wine are the temperature and the humidity. If the room is too hot or cold, it’s going to ruin the wine. The optimal temperature to store the wine will depend upon the type you have made. Generally speaking, wine is best stored in temperatures of around 55 degrees Fahrenheit. No matter what type of wine you have made, never store it below 25 degrees Fahrenheit as this could cause the wine to freeze. You should also make sure the humidity is between 60% and 68%. Knowing how to store your homemade wine correctly can help you to achieve the best results. Store it incorrectly, and it could ruin your entire batch. The above are the most important things to consider when storing wine. Ideally, you should sort out where you will be storing it before you’ve even made it.
|
|


 RSS Feed